

When we first came and looked at this house, I immediately fell in love with the space for the mud room. It was basically empty. The previous owners had a modular storage unit on one end of the room. I could just imagine the amazing potential this room held! After getting most things unpacked and put away, the mud room was the first project we tackled. Travis was sick of doing DIY projects after all the ones

Then I cleaned it out so I could send some proper pictures to the contractor. It is hard to get good pictures of the space because it is long and narrow--not to mention there are no windows, so the lighting is sub par for photos.

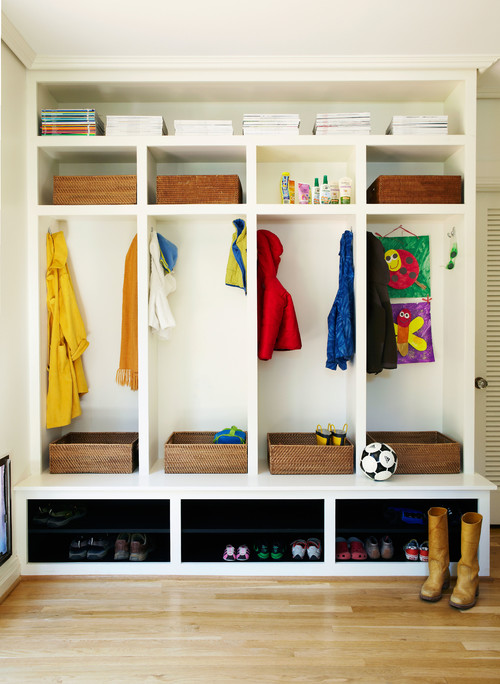
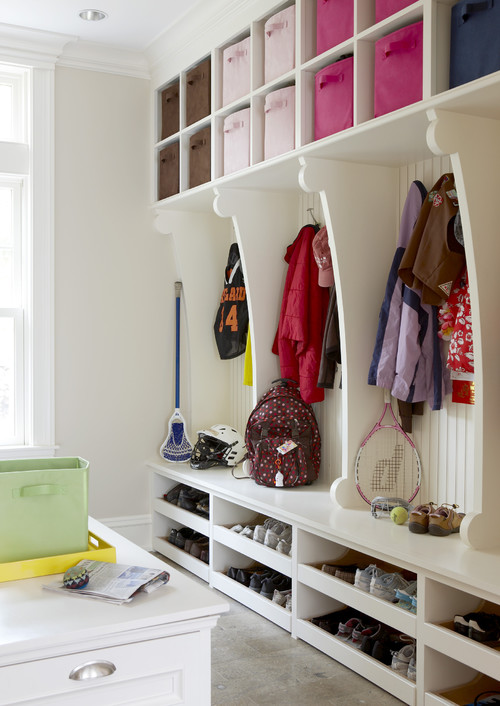
Then I started searching for ideas. Here are some that I loved:

And I know this isn't a mud room, but I knew I wanted some closed storage and I loved the look of these IKEA Pax cabinets built in by Jenna Sue Design.

Basically, I wanted these things:
1. LOCKERS so that we could hang backpacks and coats, store shoes, gloves, hats, and all that kind of stuff that you need for going out.
2. CLOSED STORAGE for cleaning supplies and a few other things
3. OPEN SHELVING for bins that hold seasonal items and other miscellaneous things in the space that is behind the doors going to the garage and to the kitchen.
4. WAINSCOTING of some sort for appeal.
5. PRETTY--need I say more?
I worked for hours trying to come up with a plan on paper so that we could have everything we wanted in the design. I measured, re-measured, searched online, etc. And this is what I came up with:

So, I sent an email to my husband with the above pictures and ideas, but because of my obsessive-compulsiveness (I wish I didn't have this problem!), I kept searching.
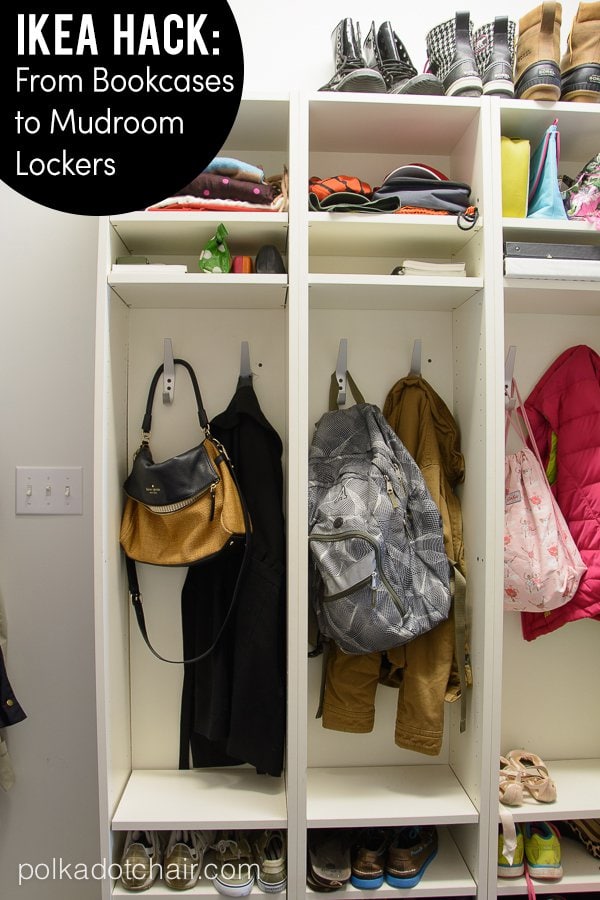
That was when I came upon these lovely ideas from The Polkadot Chair and It feels Like Chaos:

My mind started going into overdrive with the idea of doing our own DIY mud room with IKEA Cabinets. I immediately sent my husband an email trying to convince him that he could totally do it and I'd help! "Think of all the money we'd save," I said. "I know you don't want to do any more projects, but you've got this!"
I think I got him at, "Think of all the money we'd save." :)
And so it began...
We bought one of these Pax wardrobes from IKEA: (*note--having problems with this link right now. For some reason it won't come up on IKEA's website. It is about 39" wide, 93" tall and 15" deep.)

And two of these doors from IKEA to go on the Pax wardrobe.

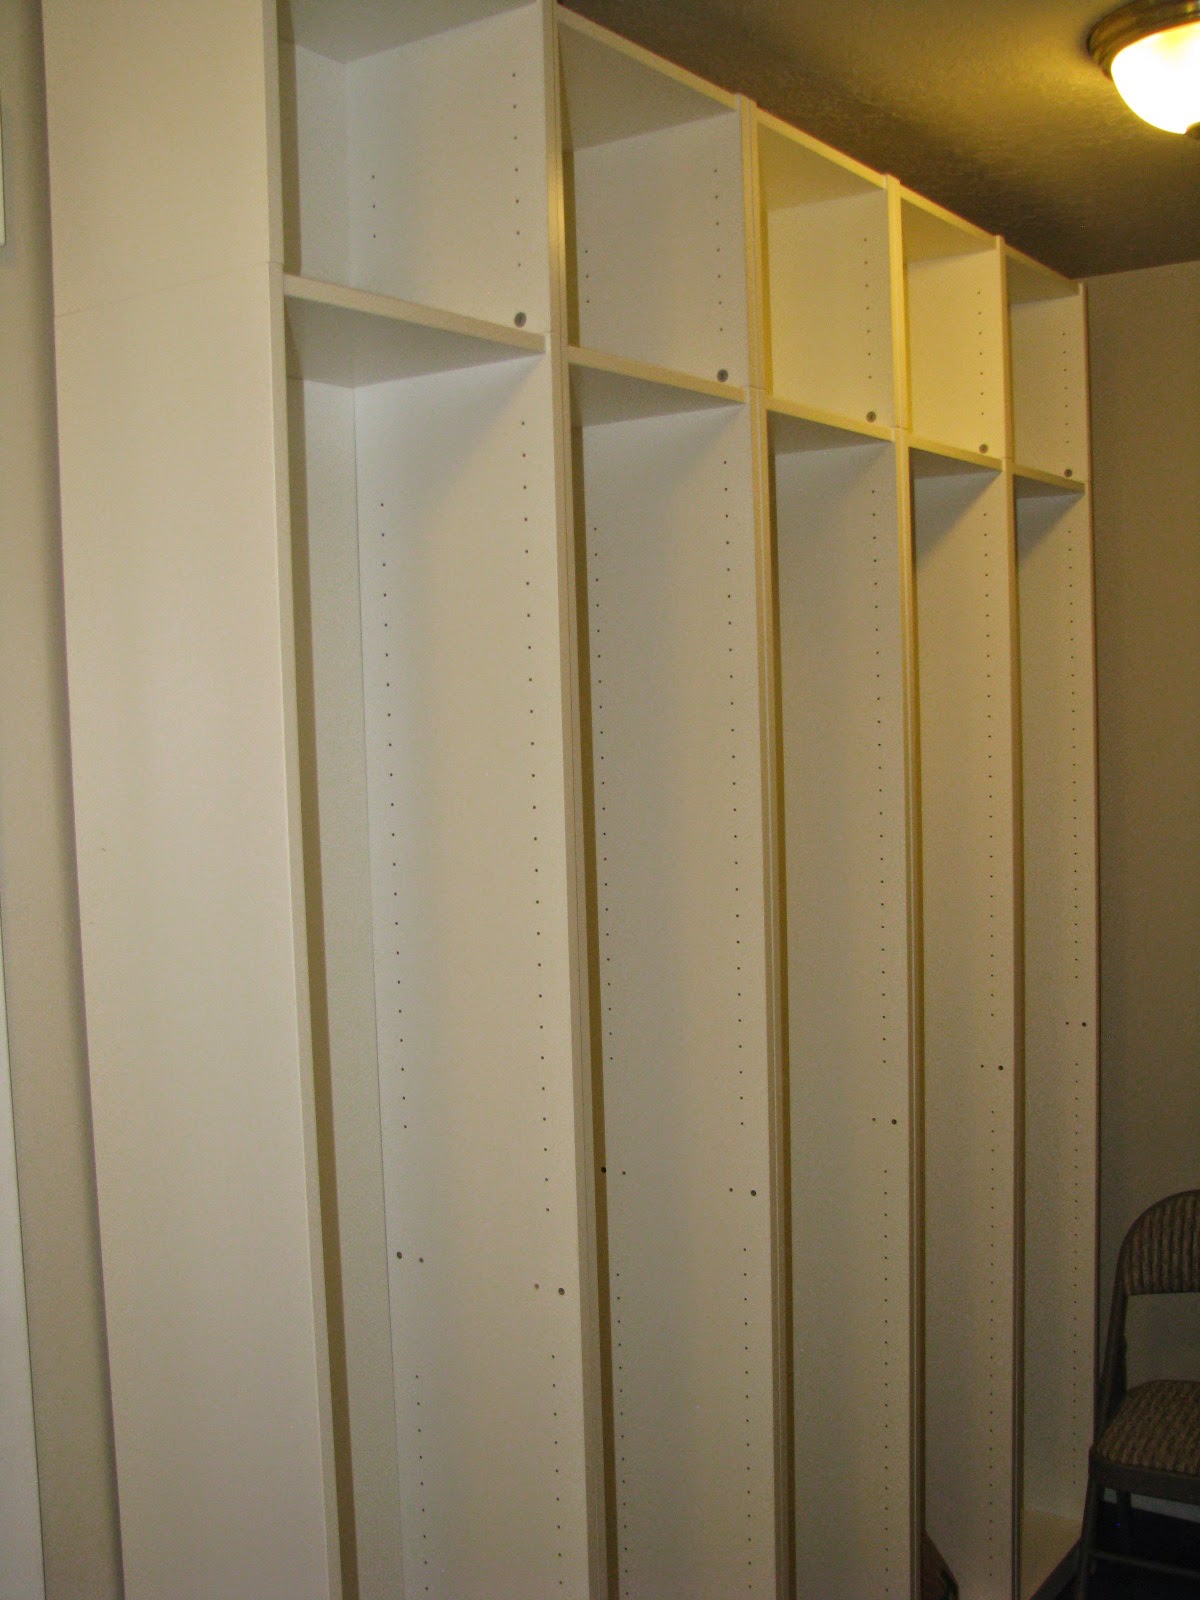
And 5 of these Billy Bookshelves from IKEA.

And because we wanted the lockers to go all the way to the ceiling, we also bought 5 of these:

Travis built the Billy shelves and the Pax wardrobe and started anchoring them to the wall.
Then he added crown molding:


You will see in my original plan/drawing I wanted 2 PAX wardrobes for lots of closed storage. My drawing also included a bench with the lockers, but since we decided to do it ourselves with an IKEA hack, we couldn't do a bench under the lockers. I tried every conceivable combination of BILLY with other IKEA TV benches, but none of them lined up exactly. So I decided it was ok not to have a bench.
However, when we went to IKEA to buy everything, we decided to just get one PAX wardrobe and see if we really needed more closed storage. This also left space on the other side of the PAX wardrobe next to the door for a bench.
When I found this picture on Pinterest, I fell in love. It's from House and Home:

Originally I wanted a plank wall in this room, but we decided to go with board and batten instead, using this photo for inspiration. I am still looking for the perfect spot for a plank wall in this home. I just love them, but I think board and batten fit in this space better. We also bought this BESTA TV bench and 4 legs.

Finally, we bought some pine wood for a bench topper as well as some wood for a shelf above. Travis cut the wood a little bigger than the bench so it would overhang. And you can see we added board and batten as well.
In the picture above, the wood wasn't attached yet, just set on top so we could see how it would look. Travis stained the wood to a dark shade that I love.
He also built the shelves in the space behind the two doors. Here they are, ready to paint.

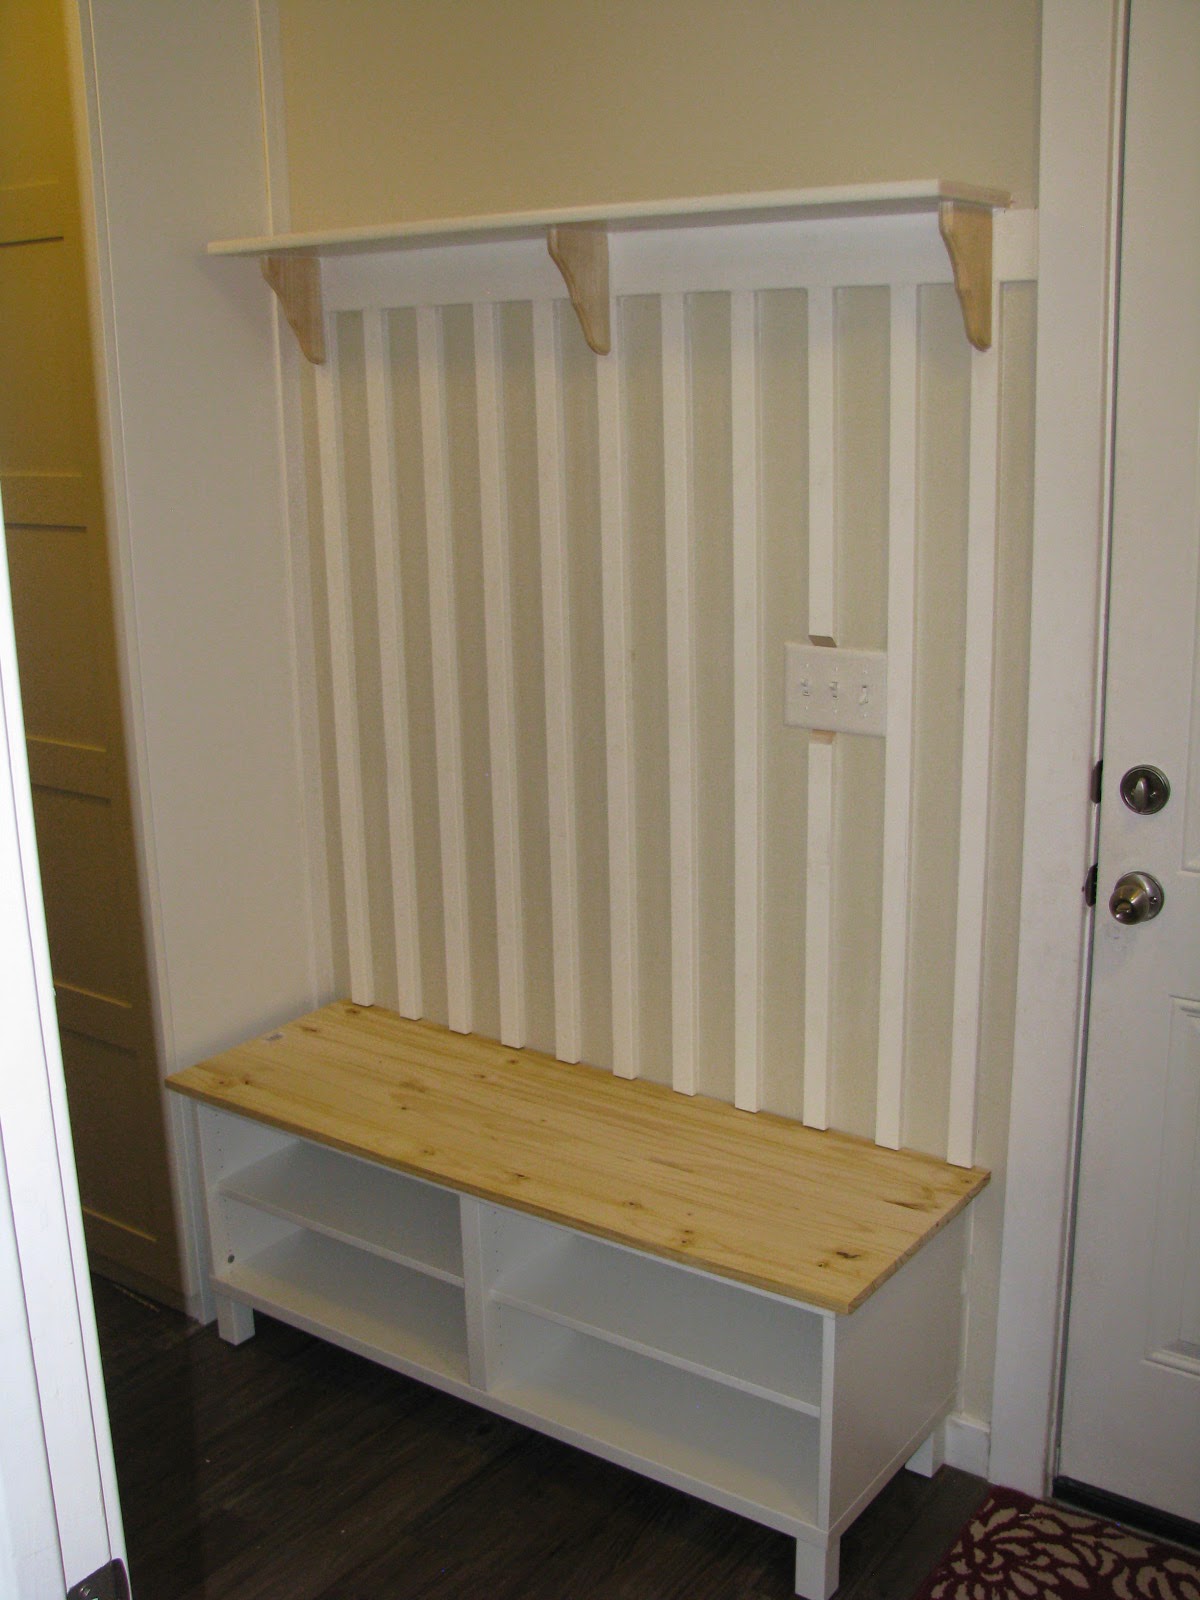
And here's the finished product:
Five lockers complete with space for papers and other misc. items, such as gloves, hats, sunglasses, etc.

A place for keys:

We attached high hooks on each locker. And on the kids' lockers (the three middle ones) we attached lower hooks on each side for their coats and backpacks. We wanted them to be able to reach them without having to step up, but we also wanted the higher hooks for when they are older.
He also covered the joining boards of the lockers with a strip of lattice trim so you can't see the line or the slight gap between the two lockers.

A bench:

Open shelving for storage:
This area still has work to do. I have some organization ideas in mind, but that will be for another post. Also, I still haven't found some of the things that I need to put over here. I don't think I've mentioned it yet, but moving stinks! I really don't like that I still have unpacked boxes.

Closed Storage:
As a side-note, we had to remove the original light fixtures because the PAX door ran right into it. So, now we have can lights.

My artwork inspiration came from Pebbles in My Pocket.

And that's that.
Beautiful! Great inspiration for what we need!
ReplyDeleteThanks, Stephenie! Have you done your project? If so, how did it turn out?
DeleteLove it! Great job, I love the crown molding!
ReplyDeleteThanks, Nikki! You are sweet! I love the crown molding too. Anything to make a space a little prettier. 😊
DeleteI was wondering how these have held up. I'm considering doing the same thing but, am concerned about the hooks being ripped out of the mdf. I's love to know how yours have lasted.
ReplyDeleteHi Cora! They have held up GREAT! my kids hang full backpacks on the hooks and they have been great for almost 2.5 years now. Everything still looks new!
DeleteIn fact, we are building a new home and I told the builder to leave the mud room empty so we could just do the same thing in our new mud room. 😊
DeleteWant to Build Mudroom Lockers...? » IKEA FANS | THE IKEA Fan Community
ReplyDeleteMudroom Storage with Bench Locksmith Gilbert
This comment has been removed by a blog administrator.
ReplyDelete